Tingyue, kindly sent some more up to date images with the grass level & growing and other plants providing settings. They’ll probably be a part 6 if and when I get back to Nanjing!


And now all five sculptures have been installed in Nanjing’s Friendship Park – over a rainy public holiday I hasten to add. Thanks again a great team!


The wet man is Mr Li, who oversaw the team who made and installed the sculptures – great dedication – I thank him and them for an excellent outcome: Well done!!
Not much to say except that the company, Xinte Ji Tuan , in Quyang has done a terrific job of moving from the clay forms to the completed bronzes. It will be great to see them set up at the right levels and distances from each other.


And they have sent photos of the completed works based on Andrei’s [Belarus] and Elena’s models.
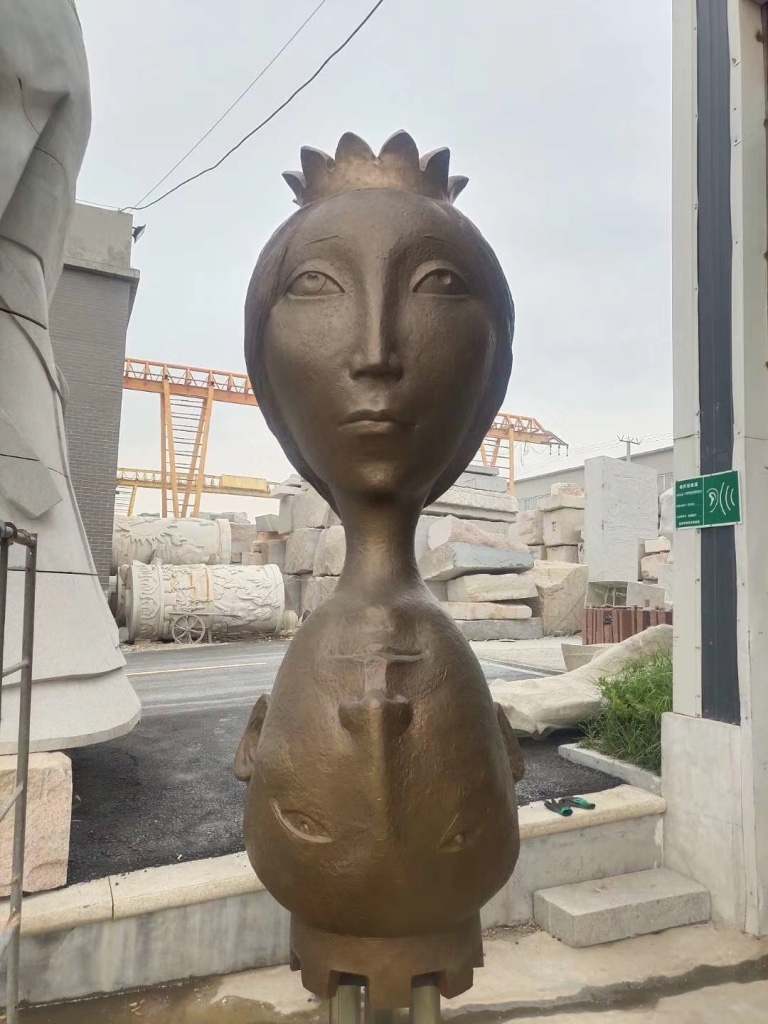

Nanjing selected 5 sculptures [out of the original 13 submitted] to be made in China. They very generously invited the sculptors back to China to finalise the works to their satisfaction and also to select suitable stone for their bases. It was all very sympathetic to an artist’s needs.
I was flown from LHR into Guangzhou and transferred to a flight to Shijiazhuang, quite far north. My destination was Quyang, which some have called the sculpture capital of China. There is good stone source nearby and the locals developed their skills in this medium and then expanded into bronze, steel, and ceramics. There was a specific sculpture “industrial” zone for Quyang and everywhere had works for sale. I suspect that everyone in Quyang either works in sculpture or has a family member or close friend involved with sculpture.
Some shots from a moving car [hence not great focus]


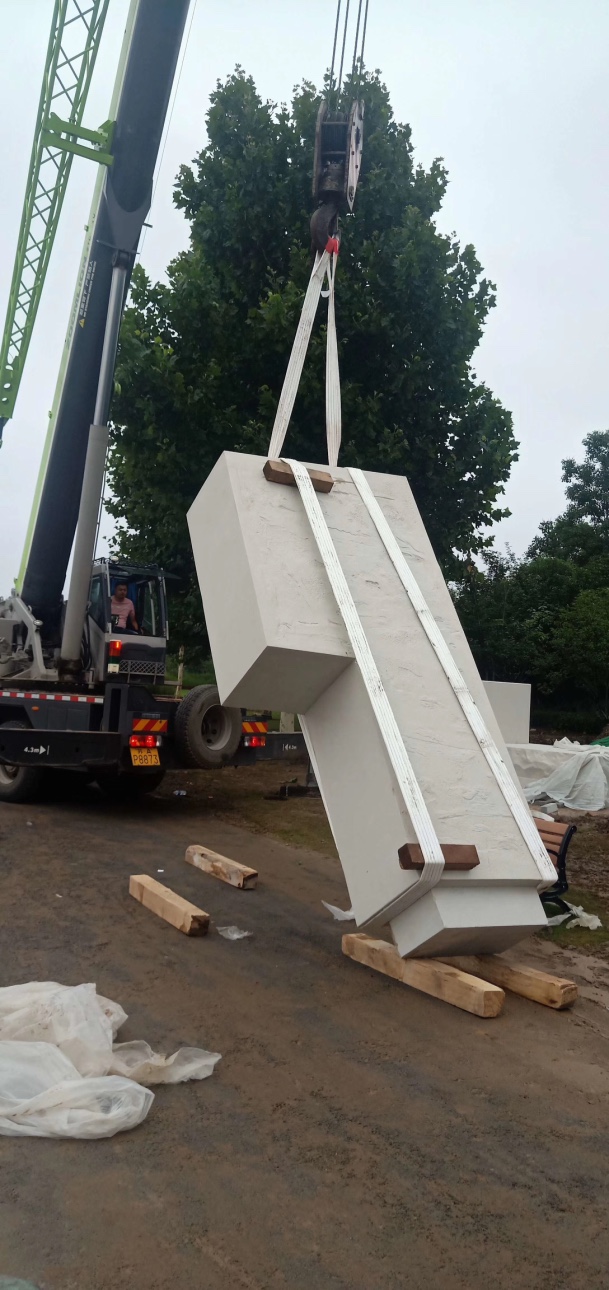
The work was being undertaken by Xinte Ji Tuan which takes on all sorts of projects. Please have a look at their website [all in Chinese] to get an idea of the range of what they do. But here are some photos of the works being finalised and the people who made them, plus other shots around the site.


Mr Ge Xiangpeng , who used to be known as Ge Yahui, undertook most of the work in the studio where my soldiers were, and had a small team to support him. A very talented man. Here is the other work that was in the studio – you can get an idea of scale from the guy top left in the scaffold.
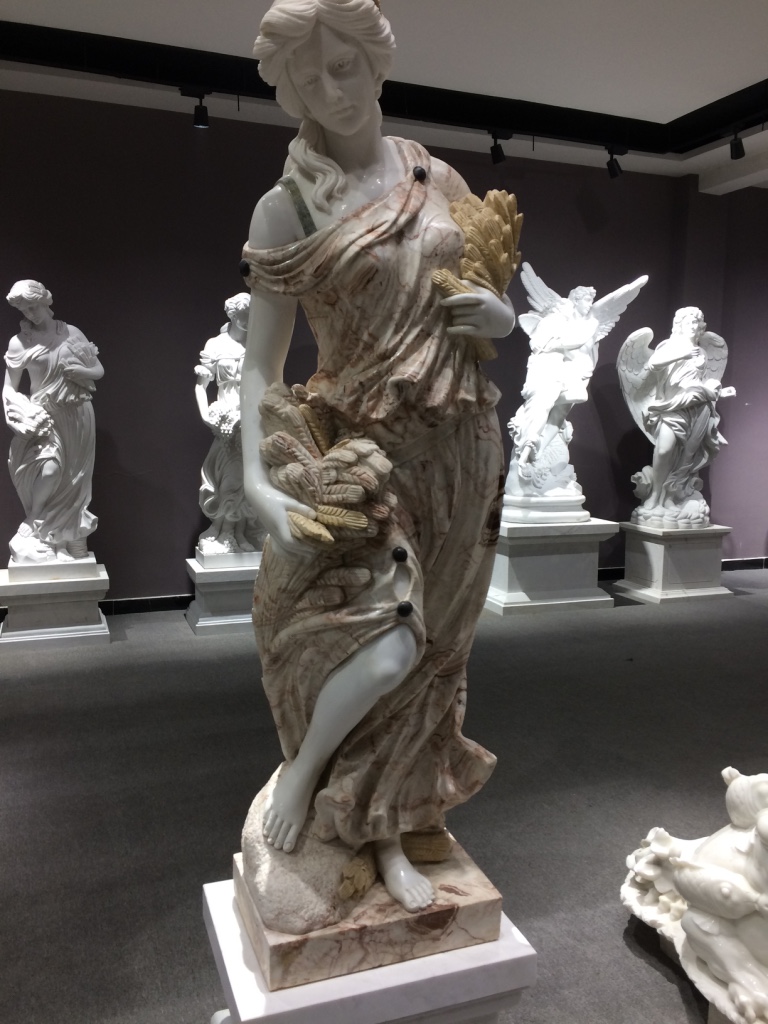
And these are shots from elsewhere in the site; small maquette, display gallery of some of their work, and two pictures of a very large polystyrene model. The people are from Nanjing and Andrei, the sculptor from Belarus, who designed the Queen’s head on the King’s. Andrei and I marvelled at the size of the work and couldn’t imagine working at such a scale.


Back in November 2018, I was asked by Dave Taylor, the deputy Mayor of the City of York, if I might be interested in designing a sculpture for Nanjing – something that would mark the twinning of the cities. I was delighted to be asked and gave him my first thoughts.
All was quiet until mid-April when I was told the project was on and would I like to go to Nanjing [expenses paid] in late May? I’d get to see the site for the sculpture and pitch my idea! Jill could come too if she paid her airfare. Of course, I needed to move from a few words to a model that expressed my thoughts, as well as get visas and decide if we could visit other parts of China [more on that in another post].
We returned from holiday near Chester and these armatures

became two figures in a few days.


I based the Chinese armour on the Terracotta Warriors [who were far too early for the Ming Dynasty – the time Nanjing – [Southern Capital] was founded by the first Ming emperor]. I was thinking that it might make the sculpture attractive if the laps of the figures were suitable for children to sit for photos, and the chessboard could be set up with an interesting match to consider.
These models were used to illustrate my initial proposal, which I also got to present at a meeting in Nanjing.
We arrived in Nanjing and found that there were sculptors from Belarus, Cambodia, Germany [two, one from old east and one from west], Hungary, Iran, Jordan, Russia, Vietnam, Zambia, and Zanzibar. We were taken to the park and given a tour with indications of where the Park’s designers’ thought sculptures could be placed. We were also shown places in Nanjing that they thought we should know about.
Here’s the site I chose – the lady with the hat [Monica, our Chinese contact] is standing at the point and I’m sitting there with “Mr Jordan”.


The site is slightly sloping down to the lake and I thought that two large chessboards could be set into the ground [one international and the other a Chinese Xiangqi chessboard] and the chess pieces could be based on landmarks in York and landmarks in Nanjing. Moreover, it could do with some seating and trees for shade.
By the time we arrived home, I realised that the figures needed to be sitting on something, and the Chinese soldier’s armour should be that of the early Ming Dynasty.
I made the armatures on the 5th of June and started modelling. I also contacted the Royal Armouries in Leeds and with the help of Dr Natasha Bennett [curator of orieintal collections] and the library staff, settled on a representation of early Ming Dynasty armour based on illustrations from the period.
And then Ed Poxon, my tutor, mentor, & friend died suddenly on the 22nd – we had been discussing the day before how to plan to make suitable moulds. Keeping Ed’s “Let’s do it!” attitude in mind I tried to carry on – modelling was within my remit but how would I manage the mould making?
By the 26th June the models were substantially complete.


Mould Making
Decided to go for re-usable Vinamold in a plaster casing. One needs to sort out the dividing line for front and back, get the model horizontal and level, clingfilm model ,and apply a clay blanket [dark clay] and make boundary wall [light clay] to stop plaster running away, and pour plaster case. The clay cones are to help air leave the plaster case when Vinamold is poured and then they fill with Vinamold. Once solid, the cones to help locate the Vinamold in the plaster case.


The plaster case comes away with the clay blanket to reveal the model. Tidy up the join along the dividing line between the front and back parts and add a clay boundary between arms and torso. Remove clay from the plaster case, refit over the figure and pour hot Vinamold.
Process is less involved for the other side as all the join lines have been addressed when making the front of the mould. the straws let air out of the mould but block off with Vinamold – the red stuff.


Then you take it apart to get the figure out – this needed cutting of the Vinamold around the legs [and this area would need holding in place later with needles]. A test pour of plaster to get an idea of how the mould should be handled – and also gain an idea of volume needed for a good cast.


Repeat the process for the Roman [apart from the plaster check].
Casting
The models were cast in two pourings of polyurethane resin, which goes off in about two and a half minutes from contact of the two-part mix. The inside of the resin shell was filled with polyurethane foam to give the model more rigidity. Thankfully, both the Chinese and Roman soldiers came out without major flaws. As you can see both had quite a bit of flashing – extra bits of plastic along the join line of the mould where the pressure keeping the mould parts together wasn’t strong enough to keep the runny resin out.


Finishing off
Once the flashing had been removed and a little epoxy resin used to re-build a damaged ear and a couple of bubble holes they were ready for painting. I used a grey car paint primer followed by Ford’s bronze paint from Halfords, plus a little bronze powder dusted here and there. And here they are. They were dispatched on the same day as last photographs below.
I have had confirmation that they arrived safely and [this week] passed the first assessment phase.


Last summer, Ed teaching Lottie, our granddaughter.
I cannot go on with this blog without referring to Ed Poxon, who died suddenly on Friday 21st of June.
Ed was a kind and generous man who provided tailored environments for students to develop. Indeed, he was such a pivotal person in the development of many people. So many have said “without Ed, I wouldn’t….” have become a teacher, or finished my course, or started on a degree, or realised that I had the potential, or have the confidence; the list goes on. Without Ed, I would not have started the degree course or come to the realisation that I can model and sculpt figures.
I enjoyed my wide-ranging chats with Ed, from his father’s time in RAF to the science behind making single crystal turbine blades, not to mention his humorous quips and discussions on UK politics. He had huge amounts of knowledge that he would enthusiastically pass on. He would go the extra mile for the struggling student, and rescued many of them in ways that felt more like “just a bit of assistance”.
Ed also had a large network of people to call upon for “favours”. I don’t know what other word to use. Moreover, I do not know how he got so many people to say “yes” to his requests for demonstrations, student placements, money for projects, etc but people kept saying “yes”.
At 52, and with a small child needing a dad, he has departed the world far too early. He will be missed by all that knew him and there is a large hole left by his absence.

Last year I was chosen, along with Kate Buckley and Lue Jaques as students to show in York Open Studios.
We were hosted by The Winning Post pub on Bishopthorpe Road who kindly donated use of one of their dining areas. My work went on window ledges and a plinth, Kate’s went on the walls, her own plinths and a table while Lue’s work went on her jewellery displays.
My work was a bit of a retrospective except a couple of pieces haven’t been mentioned on this site yet so here’s what was “new”.


These two guys are “the Conversation”, whilst below there is “Susie” in special rusty plaster [cast from mould of her head in the York Garrison Memorial Project], “Susie looking down” in ceramic, “Reprieve”, which is white glaze on ceramic, and “Tim” a buff ceramic treated with various metal oxides.


The other pieces on display are shown below and have entries elsewhere on the site.
I signed up for a ten week evening class in stone carving and finished it last night. Before the course started, I was thinking of doing a relief work based on one of Edward Weston’s nudes – many were of Charis who later became his wife. His work is still in copyright so I shall let you search for images via the links.
Each evening was three hours carving at college with input from Paul Hill who is nationally recognised for his skills. Here are some pictures of progress at about weekly stages.
First, free hand drawing on the Portland stone and then cutting to the level of the background; leaving a good border in case of mistakes:


End of the first evening below.

Once satisfied with the border of the figure, the lines of the figure are cut as V-shaped grooves and stone is removed from the figure. Care is given to where there are high points and lines where surfaces fall away or meet; rather like watershed lines on maps of mountains. Some guiding lines are visible in the picture on the right.


… The process continues with various bits of refining alone the way.


And the last stage is rounding over the “edges” and undercutting slightly to help with shadows [after all its the shadows that help define the form and reflections from surfaces give it depth].


These last two pictures are the finished piece but under different lights which give different tones and shadows. The black mark on the head is a hole defined by a shell in the stone. Some of the bumpiness where the left thigh meets the arm is because there were a few more shells and the stone was very soft. As my first go at figurative relief in stone, I am happy with the result.
Overall, I’ve enjoyed carving stone. Like carving wood, it is a reductive process – taking stuff away and no putting in back on – so it needs a lot of planning. In some ways I think that it is more forgiving than wood as you have to work slower and that allows you to think “is this right?” before you knock too much off! On the other hand, working with the grain of wood can allow one to carve very slender shapes which wouldn’t survive in stone.
Back in September I posted about hollowing out my bust of Troy so that it could be fired. Well, It was fired and didn’t take kindly to the heat – part of the left side blew off, cracked, and then it warped.

As you an see, he lost his left ear and part of his neck and some bits were too small to collect.
I used some epoxy resin to stick the broken bits on and modelled in wax some to the bits that were missing. I then applied a mix of “cognac” shoe polish [shoe polishes always have good colour fastness] mixed with lacquer to mask the various colours [clay, resin, and wax] and to also make it relatively water tight.
.
We took the bust to London towards the end of October so that it could appear at The Globe, London as part of their display accompanying an Armistice Centenary event performed by The Soldiers’ Arts Academy . We went to London then to see the dress rehearsal of the Soldiers’ Arts Academy’s “Soldier On” at the Other Palace [on until 24 November] and that was early enough for the display at the Globe. We had a great evening and I met some Chelsea pensioners – fascinating stories!


We went back to London on the 11th of November to see the Soldiers’s Arts Academy’s performance at the Globe and the next day [after amusements around London], we took the bust of Troy home.
A good outing; where next?
The roman soldier had not faired well in recent months; it dried out and cracked; mostly around the legs and forearms.

However, the head and shoulders were in a better shape so the decision was made to make a mould and then cast in a fancy concrete. Here’s the mould part way through;


And while I was trying to take the two mould pieces off model, Kate took some videos – and quite rightly laughed at the spectacle [with tutor Ed in the background muttering].
Once the mould had come off, the roman looked more like a character for an old Dr Who episode…


 \
\