Monthly Archives: December 2016

Tidying the cast

First attempt to get the plaster in the right state for repairing the cast was wrong and I had to work hard to get rid of all the drips and smears I had applied with gay abandon.  Once cleared off there were more scratches and chips to attend to.  I made certain the next time that I had “killed” the plaster as suggested in Tonk’s book so it might be softer than the main cast.  Here’s the result and I’ve now got to think about a patina and mounting it on a stand.  Oh, I also changed the right eye a bit – you can compare by flipping up and down to the last post.

I must admit that I’m really proud of what I’ve done as my first “proper” portrait sculpture with the excellent tuition from Etienne Millner.

thumb_DSC08444_1024 thumb_DSC08445_1024 thumb_DSC08446_1024 thumb_DSC08447_1024 thumb_DSC08448_1024 thumb_DSC08449_1024 thumb_DSC08450_1024 thumb_DSC08451_1024thumb_DSC08452_1024thumb_DSC08453_1024

Breaking the mould

Today was all about chipping away with mallet and blunt chisel plus picking at the surface with modelling tools.  With outer layer off, come bits of the lower layer came off too.

thumb_IMG_7367_1024 thumb_IMG_7368_1024 thumb_IMG_7373_1024

At this stage it reminded me a bit of victorian statuary in upmarket cemeteries.  More tapping away most of the day and cast was free…

thumb_IMG_7382_1024 thumb_IMG_7383_1024 thumb_IMG_7384_1024

… but there are bubbles [one in particular has obliterated the nasal septum], seam leakage, and  scratches and gouges from my enthusiasm [and not really knowing how thick the deeper layers were – although I should have known where the top of the ear was!].

thumb_IMG_7385_1024 thumb_IMG_7386_1024 thumb_IMG_7387_1024 thumb_IMG_7388_1024

Bit more tidying up where the blue bits are in the hair and filling holes [made a mess so far….].  Sorry for the pictures being distorted but I’ve been using the iPhone rather than a proper camera.  Once surface is satisfactory I’ll treat it to look like a bronze, mount it some how and take proper pictures.

Making a waste mould; part 2

I tried to follow  Albert Toft’s 1926 book on modelling and sculpting to make the waste mould. Having made the clay “cottle”  [last post] you flick wet clay at one face [with a little blue in the water, which will be explained later] so you end up with still being able to ascertain the features.  Next is a far thicker layer with some rods embedded in it.  All the flicking does make a mess!thumb_IMG_7274_1024 thumb_IMG_7277_1024 thumb_IMG_7278_1024

I didn’t think that Id made the first coat blue enough so I adde some yellow to the next coat to get more contrast.

I then looked at the bar of the piece and realised that because the head is turned it would be difficult to pull the of the mould straight back and I needed another wall.

thumb_IMG_7280_1024 thumb_IMG_7281_1024 thumb_IMG_7282_1024thumb_IMG_7283_1024

Following the instructions as best as I remembered them, I applied a coat to the back [darker blue], covered that with a thicker layer, and then did the same with the remaining smaller section behind the left ear.

thumb_IMG_7286_1024 thumb_IMG_7287_1024 thumb_IMG_7288_1024 thumb_IMG_7289_1024

I left it over the weekend and then carried on today.

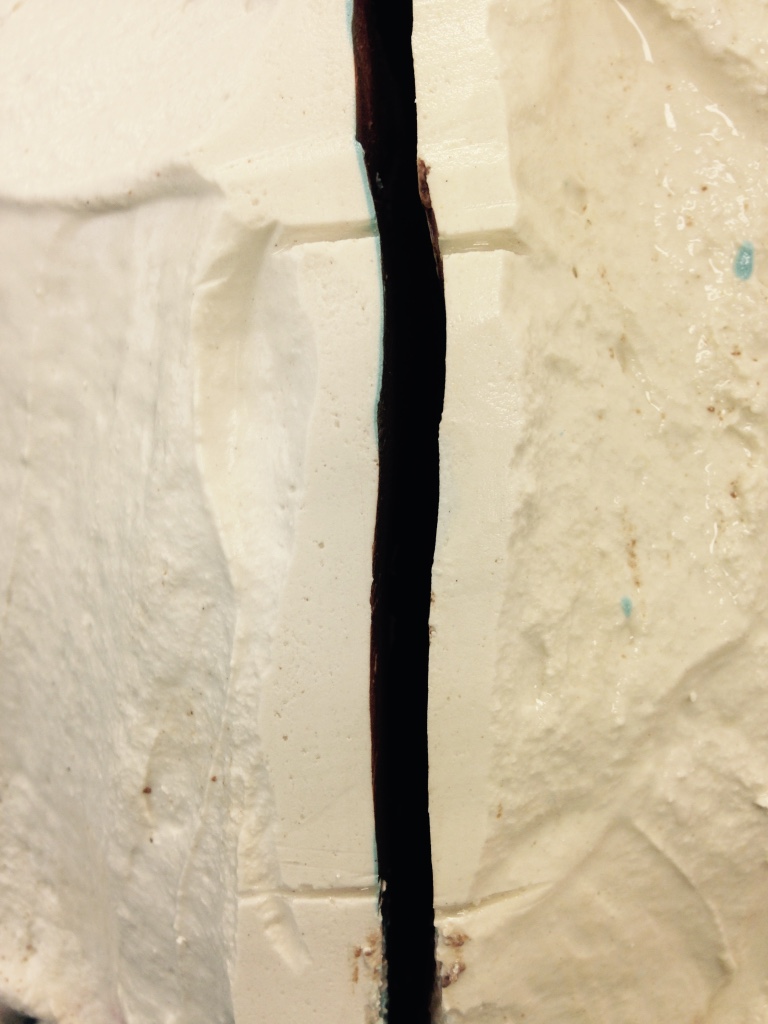
Make the mould wet with spray and sponge so that the penetrating water swells the clay inside and pushes the mould pieces apart; as soon as there is a gap slide a spatula in and help widen it so the back comes off first.  Here’s a portion of joint with registration marks opening up; teh middle one is with little if any prising on my part.

thumb_IMG_7329_1024 thumb_IMG_7330_1024 thumb_IMG_7331_1024

The back came off pictures quickly as I didn’t know if the front might fall off while my attention was elsewhere!  Here’s some detail of the hair on the right and an indication of the “damage” to the clay.

thumb_IMG_7333_1024 thumb_IMG_7335_1024

It was then that I found that I hadn’t done everything I should have done and the small piece would not come away from the front; I’d forgotten to treat the surface to stop it sticking.  So, I followed the book more carefully and dug out as much clay as could and the mould started to slide.  Off it came and here is what happened to the clay too.

thumb_IMG_7342_1024 thumb_IMG_7344_1024 thumb_IMG_7351_1024

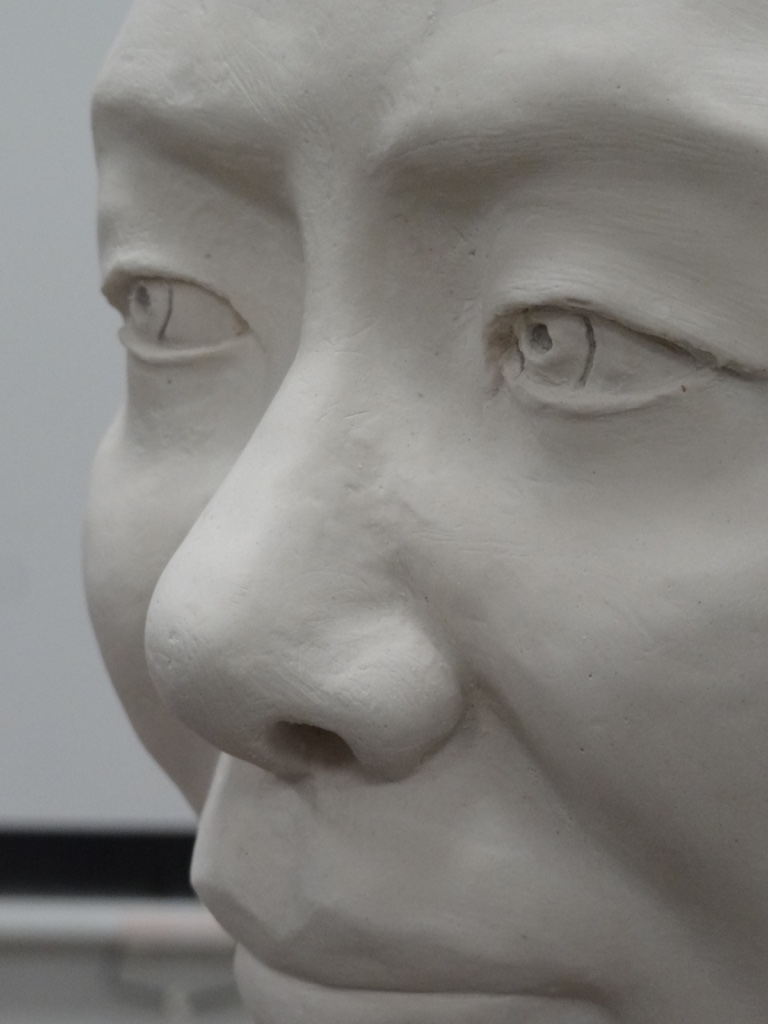
I didn’t take pictures of the washing and then brushing with soft soap as a release agent before I put the pieces back together.  The two parts of the mould are held together with straps that would allow a little give to allow the plaster it’s slight expansion.  The light in the middle picture is weird as the eyes show up but look separated by a deep shadow.

thumb_IMG_7354_1024 thumb_IMG_7355_1024 thumb_IMG_7358_1024

I have now got a positive cast inside my waste mould.  The next task is to cut the waste mould away from the cast without damaging it!

thumb_IMG_7356_1024