York Garrison Memorial

I mentioned in the last post that I had a large personal project on the go and here is the first instalment.

When I had taken the couple of busts into college [at the end of last year and the beginning of this one], I asked my tutor, Ed, if I could try making a full-size sculpture.  His reply was “why not?” but first make sure that it is a project.  Treating it as a specific project would mean that there would be a lot of thought about design, pose, size, etc and focus; all of which should lead to a successful outcome.

Well, it just so happened that the Ministry of Defence had recently announced that it would be concentrating soldiers in the north east at Catterick garrison and the Army presence in York would be no more.  York exists as a City in part from the Romans making it a garrison in AD 71, which it remained until they left sometime around AD400.  York again became a garrison in 1795.  So, why not make something to mark that momentous change?

Three rounds of maquettes to get happy with the arrangement – two figures sitting on the ground supporting each other back-to-back.  One a roman soldier, the other a modern woman soldier in battledress.  His head tipped down a bit and perhaps sad [can I model “sad”?] and her looking straight ahead, to the future.  Ideally, they would be on a plinth so children can look up into his eyes and the adults get to look her in the eye.

That took from February to May [while doing lots of other stuff].  Two members of staff kindly adopted the desired poses so I could get more detailed measurements.  And then it was time to make the full-size armatures [working off poses of two models standing with arms slightly away from sides, palms forwards] with thoughts on exactly where to position bends in armature relative to pose and limb lengths.  Get hold of pallets to raise the work up [add castors too] so by June I pretty much had the armatures finished and took a summer break!

During the Summer, a roman re-enactment gentleman kindly posed in in all his kit so I could get an idea of how materials fell and similarly a woman soldier kindly did the same in battledress.

Each armature was then padded out with polystyrene – to keep the weight down – and covered in plaster and scrim – to provide a solid surface to work on.


Finally a good coat of vinyl emulsion to stop the plaster sucking the water out of the clay – and by mid October the first bit of clay was on.

A month later and this is where I have got to with the roman [not started on the modern soldier apart from a half volume bust].  It’s still got lots of bits to add and the hands and face will be left until last as wrapping it up each day causes bits of damage here and there.

By the way, he looks to be levitating but that is on purpose; a 50mm lift from the surface allows me to model to where he would meet the ground but not have that ground getting in the way.  I’ll press on a bit more with his clothes and then start the modern soldier.


More casting – vinyl rubber

This is just quick post about some “dabbling” on the side.  At college there is a live project taking up my time and also a large personal project at college, which I want to get further along before I post.  The latter looks pretty bad at present and I don’t want anyone thinking “oh dear” when looking at the rough carcass.

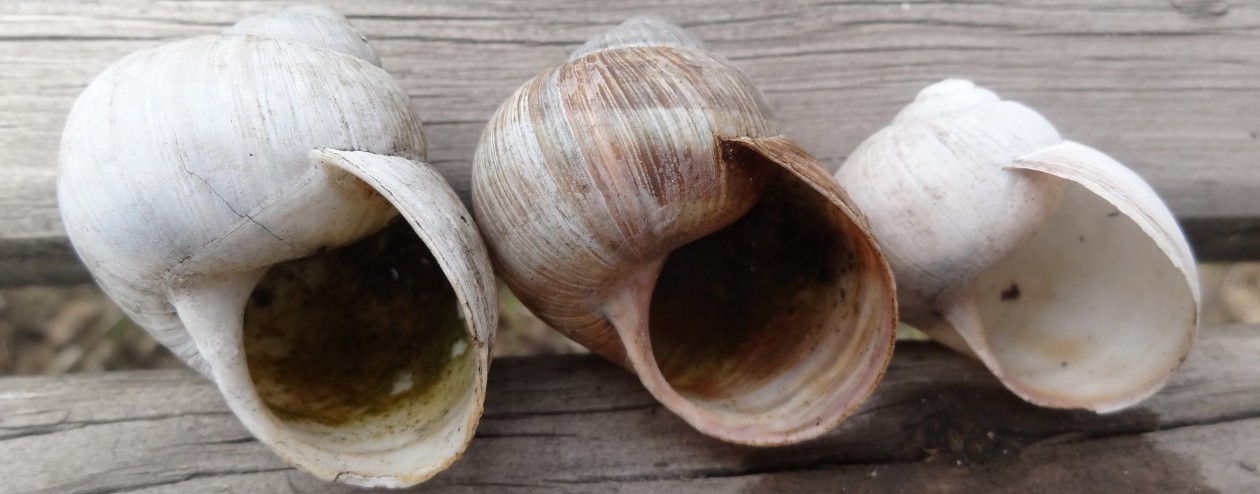
The dabbling – two vinyl moulds; one of a golfball [they do have a line round them where mould pieces meet] and one of a whelk shell.  On reflection the golfball mould should have had better constructed lugs to hold the edge of the vinyl in the plaster jacket and extra  lugs to hold the rest in the plaster jacket.  I think that if the vinyl had been thinner then registration of the mould pieces would have given me balls rather than off centred pseudo-hemispheres [middle ball has distinct “dent” one side of seam].

With regard to the shell, I decided that I needed a three piece mould if I wanted to get a good interior of the shell and still be able to extract the cast plaster from the mould.  I cast the piece of mould which fits inside the shell opening first and then built the other parts around – the bit into the opening stayed in place until all the mould was completed and it is the last piece taken away from the cast [perhaps like taking a snail from it’s shell].


The whole process shell to plaster cast was in one day while a I worked a bit on the personal project [more on that later].  Pretty happy with the result [later casts less detailed].  Vinyl rubber needs to be heated to pour into mould and does shrink quite a bit on cooling [and to counter the shrinkage is why I think I should have used less in the golfball mould].  Anyway, its all a learning process.

Casting from Plaxtin

In an earlier post you will have seen the results of me experimenting with silicone bath sealant, cornflour, and paraffin oil as a flexible mould material [Walnuts & coffee, March 2017] and this time I chose to use the silicone straight from the tube onto Plaxtin and then make a casing.

I expected the bead lines of sealant to merge [they did not] and my stuff from B&Q to be better at making a casing [it was only a bit better].  The result is here – I have put the plaster cast on a brick which I think serves nicely as a pedestal, or is it an allusion to the man’s background, or is it representing the torso; the “triple heater” [San Jiao] of Chinese medicine which derives from the three cavities of the torso [chest, abdomen, pelvis].

It’s a bit of a mixed bag – i’ve lost some of the detail of the Plaxtin original but gained a textured surface which I think makes it more rugged.

The Plaxtin does have the advantage that it doesn’t dry out so I need to try taking it into town and “sketch” people.  I think that I probably prefer water-based clay for the finishes available and ease of cleaning up after use – and it’s a lot cheaper too!

Modelling with Plaxtin

Not so long back I put up a post of my modelling with plasticine – the old school stuff.  Smelly, very stiff to work initially then rapidly goes soft and smears on one’s fingers, so not surprisingly there are other oil based [and polymer based] clays.  I wanted to have a clay that I could try sketching in – Medardo Rosso used to travel on the bus with a box of clay in his lap and sketch passengers – would that I could model like him but won’t know unless I try.


Out of all the possible oil and polymer clays and considering price I went for Plaxtin [guided also by the knowledge that the late Sally Arnup used to use it.  I bought two kilos of medium hardness and pottered for about two to two & a half hours with one kilo of it – very small bird, barely the size of the end of my thumb got squashed] and this chap who is about 12cm tall.

Works well with both wood and metal tools, nice with hands [but it was too small for for detailing with fingers], goes a bit softer with working [but not as much as the plastercine did], good colour for showing off shadows and surfaces.  A really big plus point over the plastercine is my hands washed clean of the oily residue with no fuss.

I think that I shall make a silicon mould and, if successful, several plaster copies to hand out or perhaps sell.

Losing momentum

I went on another Society of Portrait Sculptors class on the late May bank holiday weekend.  It was down in Sussex near Plumpton, so we stayed near Lewes and checked out some old haunts  before and after the course.

Silvia, the tutor, was very keen for us to make sketches of what we saw, what parts needed more consideration, how parts related to each other, etc., as she see that approach as vital to the process of modelling a portrait.  She also suggested making a maquette too.

The model, Liz, was very accommodating about showing us her tresses were wrapped up together to give the structure you see below [with my efforts for day 1].


After day 2, there was a bit more structure but no eyes as I was concentrating on the relationship of the bony parts, the nose and the mouth.  Clearly I had someway to go in mastering the brownie into the forehead.

Day 3 came and Silvia was keen that some effort should be made to place the eyes; she said that it was not uncommon to place them and replace them many time to get the position right: they each have to the right width and shape, set the right distance to either side of the nose and the right depth back in the face.  It’s easy to spot the difference at the end of the three days!

I brought the many kilos of clay home with the expectation of working on it further, hollowing out and getting it fired next academic year at college.  I kept it wrapped in the hall while we were away in Budapest for a week and then put it in the conservatory to encourage me to get on with remodelling.  However, as you’ve seen on the earlier post about casting hands, I was getting on with other things [+ stuff at college].  I realised that the eyes needed to be deeper set and higher in the face so I took off the ones from the course.

It is remarkable how how and humid our conservatory can get – the clay had dried out considerably and beyond my abilities to revive it for further remodelling.  It was too solid to consider for firing so I broke it up and have put most of it to slake down for re-use. What remains is the mask and I shall ask if it might cope with firing.

The losing momentum is in not getting this piece to a state for firing; I’m still on for more sculpting and modelling and more art.

Plasticine in the summer weather

I had tried modelling with plasticine in the winter and found it too hard to manage; spent time warming it up and didn’t like the surface finish I was getting.  Moreover, I was not sure about using an armature [would plasticine stick and perhaps there were potential corrosion reactions between the materials] Since then, I’ve found out that paraffin oil, or similar, applied by brush can be used to smooth the surface, that armatures are a good idea and one can use temperature or more oil/wax to soften the stuff.

Summer is well and truly here so I sat in the garden in the shade with my plasticine which is soft with the heat. Simple bit of armature and modelled this head and neck, which is about 9cm high.

I’ve been reading an lot about Medaro Rosso and his work.  Most of his sculpture were made more than 100 years ago and he was given the label of being an impressionist sculptor because he was trying to capture that moment of recognition before all detail had come into focus.  He quickly became as interested in a person’s shadow as the person since all we perceive is the presence or absence of light [and all the tonal values between].  A large amount of his later time was spent in examining how light fell upon his works, what was the best position to view and photograph each work, where was the best best position for the lights?  One only has to stop for a moment and realise that most sculpture we see is not the 3D work itself but someone’s photograph[s] trying to do it justice.  The two pictures above were re-worked from these two pictures taken with telephoto to try and avoid distortion.

The three below were taken closer up but the camera had difficulty deciding where to focus and gave up – I like the blurriness as one has to work at deciding what one is looking at.

College is substantially  finished for the Summer break and I’ve got lots of bits to work on and write about in the coming weeks.

More casting

Possibility of casting someone’s hands in bronze, so I thought I’d better familiarise myself with the materials and method for making a positive.

I used two bags of Alginart [a colour changing alginate like the stuff used by dentists for taking moulds of teeth and gums] as one site suggested that was enough to cast a pair of hands.

Measure the water into a bucket, stir in the Alginart, keep stirring until the bright pink starts to fade then plunge in the hands and keep tight for a few mins while it continues to change colour to a sort of white.  Mould complete, gently wiggle hands and they come out with a bit of a slurp sound.

Mix up plaster [I will do it in wax later], pour it in mould and roll it around until it sets – bit of a problem as the plaster wants to pour back out again.  Plaster sets and doesn’t look too much different.

Cut the alginate [it is a bit like how I imagine very poor and watery ham], remove mould from bucket and break and cut away remaining alginate to reveal plaster.


I want to cast to about watch strap level and have the fingers less flexed so that will need a taller bucket and probably 4 bags of Aliginart.  Doing the wax will be pour it into mould and out again building up layers like on a candle wick [except this time it is on the mould’s inner surface.

More later………


Stone carving

I have had six evenings carving stone under the watchful eye of Tim Foster [who had a large input to my earlier woodcarving].  Most of the fees were generously covered by Re-Making Leeds [distributing Heritage Lottery money] and took place at York College in the stonemasonry dept.

Tim set us the task of carving a green man as it required some free hand work and, if mistakes were made, could be rectified and still have a good carving.  The blocks were sandstone and mine, unfortunately, had a great range of texture from crumbly sand to chunks that were almost solid quartz!  None of us finished but we all got quite a long way into the project and here is mine as it progressed.  But first is Tim’s piece to show how the work might progress.

Timber!

I was inspired by the works of Bruno Walpoth and Aron Demetz, particularly their willingness to accept the splits and twists in wood as it seasons – both have worked with whole unseasoned tree trunks.  I think that using unseasoned tree trunk stops people from looking for a strongly realist work – it will always show that it is wood! I thought I would try too and set about acquiring some tree trunk.

I was lucky that up the road someone was having a seemingly perfectly healthy lime tree felled as there was a large insurance risk if it fell the wrong way!  I heard chainsaws and went in search of their operatives.  Richard Emberton, a partner of Treesaw, was on site and listened to my request.  He kindly dropped off two sections of trunk and they have rested on the driveway ever since.

Then, within the month, another lime tree nearby was being chopped down [this one had rot].  Again, I was fortunate that the tree surgeon, Bob Nut, cut me a section of trunk and, while I got the car, he turned it into a rough cube shape.

Now I have three large pieces of lime and intentions but not enough kit.  My friend, Glen Gears, kindly lent me his petrol chainsaw and his PPE so I could have a go at removing stock from the section Bob Nut provided.

Unfortunately I was incompetent at handling the saw [pushed the bar to hard perhaps], or the chain was bit blunt on one or more teeth on one side, so all the cuts had a twist in them [especially with the grain], and I made some mistakes on where I cut.

Next I was buying my own chainsaw, this time an electric Husqvarna, and their minimum pack of PPE.  However, I had problems with supplier and in the meantime used some of the off cuts for practice with gouges [no model[s], just the idea of faces and bits of same].


With my own chainsaw, I set about taking more stock off the block from Bob.

I also took some wood off with gouges – a bit too much on the right side of the face!  That was back in February and I stopped to get on with some modelling in clay, then go see my Mum, hares in Norfolk, and family in Budapest, etc. But with the beginning of April I started again with carving.  Because I’d been rather too enthusiastic on the right side of the block [there is not enough “cheek” to balance with the other side], I decided to model the left side of the face for practice.

Carving outside in the Sun for the last couple of days has been a joy, surrounded by birdsong, bees humming, and plum blossom dancing in the breeze.


I’ve now got the choice of push all the timber back on the left side of the face so I can “match it” with features on the right or abandon it.  In it’s current state, it  suggested to me  “Bones” in the TV version of “Star Trek”, i.e. DeForest Kelly, but that might only be because of the seemingly raised right “eyebrow”.  Oh, by the way, the eye is crayon drawn on.

While the weather is good, I think I should press the left side back and try to make a face and use the second portrait cast as a model.


Homer moment

That’s a Homer Simpson “D’oh” moment.  The mould is leaking from loads of places and difficult to control; what can I do?  D’oh, there’s a tube of sealant sitting on the bench in front of you, and it sticks to sealant.  Why not go over the leaky bits and close up edges as much as possible? Did that and poured another cast [but limited by the amount of plaster I had to hand].

Mould doesn’t look much different but it leaked a lot less.  Strange thing is the 1st cast [on the left] when weighed with handle and missing bottom is 143g and the 2nd cast with handle [it retained a base] is 145g.  A re-run of pre-sealing bits I don’t want to open, a bit more plaster, and a bit more moving  the whole lot around before the plaster sets might generate a “complete” pot.  on the other hand, given the translucency of the casts [1st with candle and 2nd daylight],

I could consider making 1/2 moulds with thickened edges for mounting as lamp shades [LEDs inside].  Whole lot would be extremely fragile.

While on lamps, the idea did cross my mind of making coffee flowing from pot in clay [probably cast pot and coffee flow as separate pieces to get some strength in latter and a tube inside for wire] and have coffee as a lamp’s base and upright with pot glowing on top – very kitsch.