Author Archives: vincent

Walnuts and coffee

As Garrison Kiellor was oft to say “It been a quiet time…”.  Last post was the end of Jan and I suggested that I would post about remodelling the eyes of the last bust.  However, I am not happy with outcome and not able to improve on matters for technical reasons [not enough plaster to gouge into].  So, the bust is now sitting in the dining room and I turned to the next project.

When Ed, my tutor, saw the second bust he asked if I would be interested in doing a full-size sculpture of a person – what an opportunity – of course!  Much of my time since then has been spent on that project [which I shall write about later] but more recently I have been exploring making moulds.  I do not want to make a waste mould on a full-size sculpture, so I have been looking at flexible moulds with outer, harder casings: The harder casing stops the flexible mould distorting while casting and then you pull the casing off the flexible mould and peel the flexible mould off the cast- simple with lots of detail and not many mould pieces.  However, there are several ways of making the flexible moulds and most are messy and expensive.

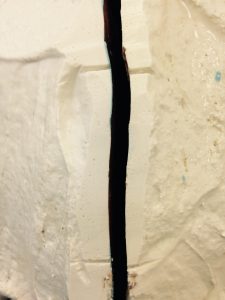
The budget moulding material is silicone frame sealant in equal weight to cornflour and then about 20% to that combined weight of mineral oil – I chose to use some coloured paraffin [bought ages ago for a lamp].  The resulting glup was spread onto a walnut and put on a piece of paper to set.

The nut sunk down while the glup set to give a hole in the base so when I partly filled it with plaster the stuff dribbled out but here’s the nut and the cast.  You can see the “flashing”, the fine excess sheet of plaster [which got pared off].

I did another walnut mould and kept the gulp and nut moving in my gloved hands until it was a lot more set – got a good cast with hardly any flashing to prise off. Thought I’d try colouring the plaster mix – used ink – and off again.  By the way, the pins are used to attempt to hold the cut line together while the mould is moved around to distribute the plaster and stop the plaster running out of the mould.

However, both times with ink and the plaster set very fast – probably the ink changed the pH.  Then onto the espresso coffee pot; lots of flat surfaces and direction changes.

Set the pot level on it’s side and build a clay wall with a stopper in the spout.  Decided to do the base and half a side and half top as one mould piece.  Mixing the ingredients was very much like making fondant icing.

Then tried to build a casing but as it was the weekend settled on “filler” as I had no plaster.  But that was a disaster! it wouldn’t set!  Turned over and cleaned other side for the next coat.

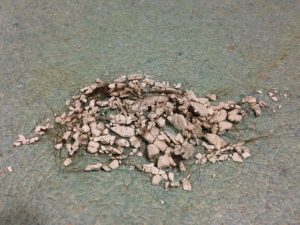
Tried making a casing in plaster at college but ran into problems because of the rubbish “filler” casing it was to abut against.  Here you can see how the “filler” casing crumbled with little or no provocation.

I decided to try making a cast without any casing.  Without the casing, and as many pins as I thought should have been enough, the mould pieces didn’t hold together and leaked the plaster while it was runny.  Lots of moving the mould around to distribute the plaster while it was leaking from several places.

Pins out and open the mould carefully I found the handle had come off and then the bottom fell in!  The pot is a bit out of kilter, which I find interesting, and the surface has extra bits of plaster, which look a bit like crystals [but are actually distorted “bubbles” where the mould material was not spread against the pot].

Sitting on a bit of wood [so air can get in] over a candle and it presents as an interesting light feature.

The last few days of moulding and casting has given me a lot of experience to draw upon.  However, it was all thrown into stark contrast by visiting the studio of Sally Arnup, a great animal sculptor who lived on the edge of York. I just looked at her moulds and thought, “Oh, that’s why my casings were useless and why my flexible moulds should have locating lugs for the casings”.  Next time my moulds will be much better.
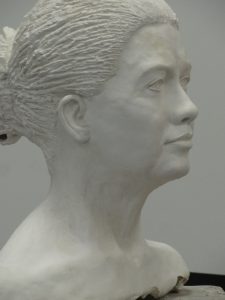
Out of the mould and tidied up a lot

Same process as last time of trying to carefully cut away the plaster mould, hoping not to chip it in the process, and hoping to be free of holes

.

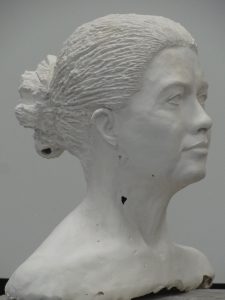
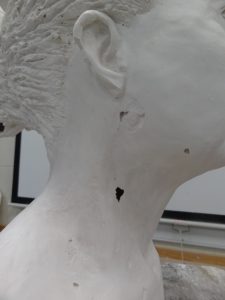
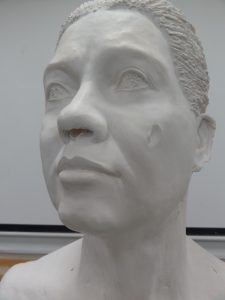
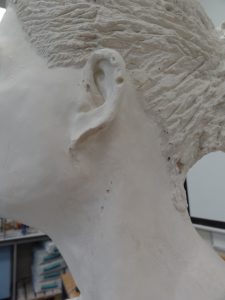
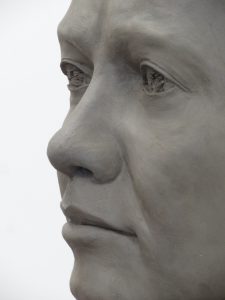
Both ears lost to bubbles [as are the pupils and septum of the nose], there’s a large void in the chignon, a defect at the right jaw angle, and the print of my plaster flicking hand having hit the left cheek!  There are also gouges in the plaster from the chisel used to remove the waste mould.  Having said that, the chignon came out quite well and most of the surface is there.  The pictures above are pretty much how the cast looked by close of play Monday.

Today, it was repair time, “killing” plaster as Toft suggests, and then getting it onto wet parts of the cast.  There is a lot of time pressure as early on the plaster is very runny [single cream], then it thickens and will start to hold shape but then it quickly goes off so it can’t be handled.  However, has not gone hard enough to model or carve.  Carve too early and bits fall off, carve too late and the plaster is a lot harder and therefore difficult to carve.

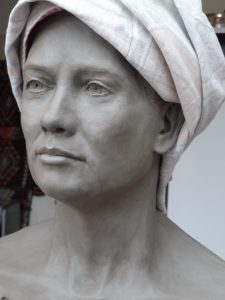
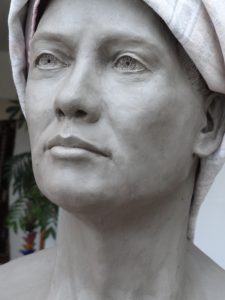
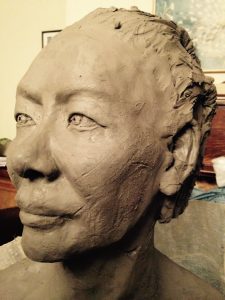
I hope that you can see on the pictures below that I’ve attended to all the problems except the hole in the chignon, which i like, and the eyes [better done with some drill bits – sounds nasty].  Still not sure about the hairline; maybe fashion a headscarf or turban……

Once I’ve sorted the eyes, I shall photograph again in better light – and will turn my attentions to a mount/stand as a finished piece for college.

Making a portrait without the model

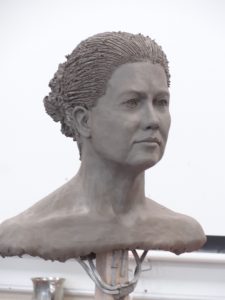
For just under two weeks I have been trying to fashion a portrait bust of Alice using some measurements taken just before Xmas, some extra photos [supposedly straight on and sides left & right].  By Sunday the 15th I had got to here [teatowel cover as never liked hair on sculpted portraits].

thumb_DSC08538_1024thumb_DSC08539_1024 thumb_DSC08540_1024 thumb_DSC08541_1024

Whilst there is lots to recommend the piece it still didn’t look like Alice to my eyes – or to Jill”s either!  JC Rich says in his book on sculpture [1940s] that trying to model someone you know well is very difficult as you keep melding together all your experience of that person.  Both Eduoard Lanteri & Albert Toft  [19th into 20 century] suggest starting to learn to model with an older man’s face so I’m not picking an easy route.  So there was more fine-tuning [fiddling] and still not satisfied.

However, I went looking on YouTube for modern portraitists where you can see the their work and the person it is modelled on.  Well, Amelia Rowcroft does a pretty good job from photos as does Mike Hill [who is mainly hyperrealist but from photos] but there are many who offer portraiture but, to my eyes, don’t deliver [eg, Lena Toritch  and also doyen Tip Toland].

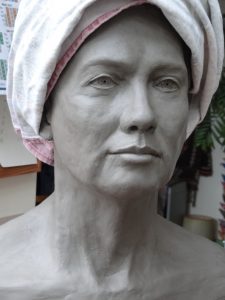
On Monday, I took what I’d done to college and gained useful feedback from Ed Poxon our tutor. So did some more fiddling on Tuesday and this was the result [should have kept the tea towel for better comparison] ….

thumb_DSC08579_1024 thumb_DSC08584_1024 thumb_DSC08585_1024 thumb_DSC08586_1024

On Wednesday I made the mould and today, took it off the clay, cleaned it and treated it with release agent – think that the chignon formed well in the mould.  Then I re-assembled the three mould parts, secured them and poured my cast in higher quality plaster [Crystacal R] than I have used up ’til now.  Ed suggested I try using my hand inside the mould to help the plaster be appropriately distributed [and showed an example of technique].

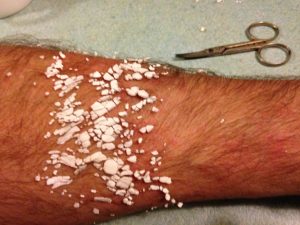
Mixed too much of new style plaster, which sets very hard, and got tied up with large forearm and narrow internal neck of mould.  Pressed on with more plaster for strengthening scrim and came away with an uncomfortable left forearm with loads of hairs stuck together!  Now forearm much more comfortable if a little naked.  Next time apply Vaseline to forearm first or, perhaps, go for pour in and rotate the mould to distribute the plaster [or get an assistant with small hands and forearms!]

thumb_IMG_7554_1024 thumb_IMG_7555_1024 thumb_IMG_7556_1024

I’m really not sure how well the pour went – will find out on Friday if I manage to get into college..


Tidying the cast

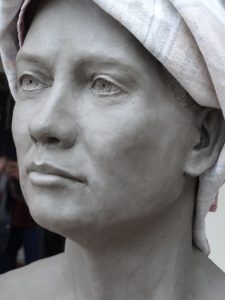
First attempt to get the plaster in the right state for repairing the cast was wrong and I had to work hard to get rid of all the drips and smears I had applied with gay abandon.  Once cleared off there were more scratches and chips to attend to.  I made certain the next time that I had “killed” the plaster as suggested in Tonk’s book so it might be softer than the main cast.  Here’s the result and I’ve now got to think about a patina and mounting it on a stand.  Oh, I also changed the right eye a bit – you can compare by flipping up and down to the last post.

I must admit that I’m really proud of what I’ve done as my first “proper” portrait sculpture with the excellent tuition from Etienne Millner.
thumb_DSC08444_1024 thumb_DSC08445_1024 thumb_DSC08446_1024 thumb_DSC08447_1024 thumb_DSC08448_1024 thumb_DSC08449_1024 thumb_DSC08450_1024 thumb_DSC08451_1024thumb_DSC08452_1024thumb_DSC08453_1024

Breaking the mould

Today was all about chipping away with mallet and blunt chisel plus picking at the surface with modelling tools.  With outer layer off, come bits of the lower layer came off too.

thumb_IMG_7367_1024 thumb_IMG_7368_1024 thumb_IMG_7373_1024

At this stage it reminded me a bit of victorian statuary in upmarket cemeteries.  More tapping away most of the day and cast was free…

thumb_IMG_7382_1024 thumb_IMG_7383_1024 thumb_IMG_7384_1024

… but there are bubbles [one in particular has obliterated the nasal septum], seam leakage, and  scratches and gouges from my enthusiasm [and not really knowing how thick the deeper layers were – although I should have known where the top of the ear was!].

thumb_IMG_7385_1024 thumb_IMG_7386_1024 thumb_IMG_7387_1024 thumb_IMG_7388_1024

Bit more tidying up where the blue bits are in the hair and filling holes [made a mess so far….].  Sorry for the pictures being distorted but I’ve been using the iPhone rather than a proper camera.  Once surface is satisfactory I’ll treat it to look like a bronze, mount it some how and take proper pictures.

Making a waste mould; part 2

I tried to follow  Albert Toft’s 1926 book on modelling and sculpting to make the waste mould. Having made the clay “cottle”  [last post] you flick wet clay at one face [with a little blue in the water, which will be explained later] so you end up with still being able to ascertain the features.  Next is a far thicker layer with some rods embedded in it.  All the flicking does make a mess!thumb_IMG_7274_1024 thumb_IMG_7277_1024 thumb_IMG_7278_1024

I didn’t think that Id made the first coat blue enough so I adde some yellow to the next coat to get more contrast.

I then looked at the bar of the piece and realised that because the head is turned it would be difficult to pull the of the mould straight back and I needed another wall.

thumb_IMG_7280_1024 thumb_IMG_7281_1024 thumb_IMG_7282_1024thumb_IMG_7283_1024

Following the instructions as best as I remembered them, I applied a coat to the back [darker blue], covered that with a thicker layer, and then did the same with the remaining smaller section behind the left ear.
thumb_IMG_7286_1024 thumb_IMG_7287_1024 thumb_IMG_7288_1024 thumb_IMG_7289_1024

I left it over the weekend and then carried on today.

Make the mould wet with spray and sponge so that the penetrating water swells the clay inside and pushes the mould pieces apart; as soon as there is a gap slide a spatula in and help widen it so the back comes off first.  Here’s a portion of joint with registration marks opening up; teh middle one is with little if any prising on my part.

thumb_IMG_7329_1024 thumb_IMG_7330_1024 thumb_IMG_7331_1024

The back came off pictures quickly as I didn’t know if the front might fall off while my attention was elsewhere!  Here’s some detail of the hair on the right and an indication of the “damage” to the clay.

thumb_IMG_7333_1024 thumb_IMG_7335_1024

It was then that I found that I hadn’t done everything I should have done and the small piece would not come away from the front; I’d forgotten to treat the surface to stop it sticking.  So, I followed the book more carefully and dug out as much clay as could and the mould started to slide.  Off it came and here is what happened to the clay too.

thumb_IMG_7342_1024 thumb_IMG_7344_1024 thumb_IMG_7351_1024

I didn’t take pictures of the washing and then brushing with soft soap as a release agent before I put the pieces back together.  The two parts of the mould are held together with straps that would allow a little give to allow the plaster it’s slight expansion.  The light in the middle picture is weird as the eyes show up but look separated by a deep shadow.

thumb_IMG_7354_1024 thumb_IMG_7355_1024 thumb_IMG_7358_1024

I have now got a positive cast inside my waste mould.  The next task is to cut the waste mould away from the cast without damaging it!

thumb_IMG_7356_1024

Making a waste mould

With Jill’s help trying to stabilise the sculpture on the back seat of the car, we got it to college late yesterday afternoon.  Today, I tidied up the scratches on the face, re-did the hair and sorted out the squashed ears.

thumb_DSC08409_1024thumb_DSC08419_1024thumb_DSC08425_1024

Before setting off on making the mould, I decided to add a bit more clay to the back and front of the trunk to get a better balance to the piece.  Then I set about making a clay wall along the major outline and, following convention, made the side facing forwards the smooth side.  There are lumps of clay behind the wall to give it some support.

thumb_DSC08431_1024thumb_DSC08434_1024thumb_DSC08441_1024

Tomorrow I shall plaster the front and hopefully the back.  There is a small possibility that I may also start to clean up the mould too but I need to check that out.


Modelling a head

Some time ago Tim Foster, a wood and stone carver [evening classes at Yorkshire Hut Company], suggested that I should consider making pieces in clay before trying them in wood.  There were two reasons behind the advice, one was that the act of generating the clay model would help iron out potential problems before starting a carving and the other reason was – if you can’t make it in clay [a medium where you can repeatedly put bits on and take some off], you won’t make it in wood.

I’ve kept that advice in mind and avoided heads, and more particularly faces, as I struggled with the quality of my attempts.  However, things have changed following a terrific three day class for portrait sculptors organised by the Society of Portrait Sculptors and tutored by Etienne Millner at his studio.

Pre-course instructions were usefully detailed and included included size and materials for a bust peg [the thing one puts clay on to build a bust] – here’s mine:-

thumb_IMG_7207_1024

There were 10 students, probably four were under thirty, and I was the only man amongst them.  Etienne and the Society provided each of us with a wheeled modelling stand [which were adjustable in height and very well made] and Etienne had arranged for Hong to be our model for the whole period. He also generously arranged lunches at his home for those who wanted to partake.

Etienne’s studio had been a squash court and had a large roof lights so the space was flooded with fairly diffuse light.  I could have spent ages walking around looking at all the casts of his work sitting shelves [visit his site to see what I mean].

Overall I felt very encouraged by Etienne’s method of tutoring [although before the course I was more than a little daunted by the prospect of input from a man who has work in the National Portrait Gallery].  I felt carried along by Etienne’s analysis of what I had done, where there were mistakes, which detracted from the work, and how defects could be altered.  Etienne would rotate between students, perhaps clockwise one day and anticlockwise the next thereby giving one time to incorporate his input into one’s work.

Hong was a delightful model, so calm, still and unfazed by so many approaches of students with callipers trying to measure this distance or that.  And here she is:-


thumb_IMG_7253_1024

By the end of Monday my armature and wet clay weighed over 14.5kg and I had the choice of go home with a set of pictures or try and get it home by public transport [Stockwell tube to York] while carrying my rucksack of about 6.5kg.  Thankfully I had pre-planned and had some Instapak RT bags with me [hang over from inventing days] and managed to pack the work in a cushioned fashion in the bag I’d carried the armature in to London.  So, here’s the piece before and after travel – only a few scratches, which it should be possible to repair and then cast.thumb_IMG_7257_1024 thumb_IMG_7269_1024

As ever there is still so much more to learn and to practise!


Ancient to contemporary

Earlier this year there was a short series on BBC4 about ancient treasures found in the UK. They showed the Broighter Gold Hoard, and I was very taken with how it was all gold and made without soldering parts together.  There is a cup with rings on its edge so it looks like a small cauldron. a heavily decorated torc and a small boat with oars, mast, yardarm, and some marine tools.  I couldn’t help but be inspired by the boat and thought how in many ways it seemed to be a contemporary object.  Now, as when it was made in the 1st century BC, a model boat can be used to symbolise life’s journey, references mythic epic journeys, and passage from life to death.
Having made some sketches in early summer and thought about what I wanted to do next, I set out to make my own boat in copper in the way the Broighter boat was made.

IMG_5992_1024thumb_IMG_6732_1024

thumb_IMG_6733_1024I decided on a more pointed bow and less deep hull and then cut a blank out of sheet copper using the guillotine.

thumb_IMG_6734_1024

I do not know what was the starting point for the ancient gold craftsman – was it a crude ingot from smelting?  Would cutting be by chisel or were saws or shears used?  With every question I raise, I think that maybe I should go to the Museum of Ireland where the hoard resides [or at least write to them].  Anyway, as with the bowls in earlier posts, it was a repeat of annealing [making the metal soft], beating it towards the shape wanted until it had become work-hardened, and then anneal again.

thumb_IMG_6735_1024thumb_IMG_6736_1024thumb_IMG_6743_1024thumb_IMG_6744_1024

Once happy with the form I had to hold it to drill holes for the oars and the rivets for the seats.

thumb_IMG_6865_1024thumb_IMG_6867_1024

It looked to me that it would be tricky to get the seats the right size so I made templates in thin card as each seat was a different length and the folds in at the end at different angles.

thumb_IMG_6887_1024thumb_IMG_6888_1024

You may have noticed the other whitish object in the left-hand picture – it is tooth of a horse or cow we found in the outer hebrides this year.  I decided to drill a hole in ti to help stabilise the mast and give the boat some ballast.  Below are a few shots of the finished boat.

thumb_IMG_6896_1024thumb_IMG_6902_1024thumb_IMG_6904_1024

Wire work

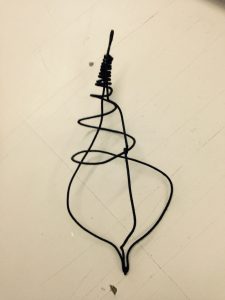
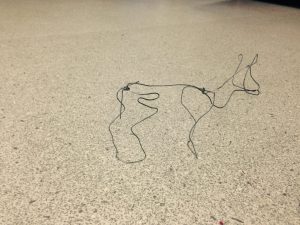
Yesterday’s was to follow instruction and make a bird form in wire and then, working from natural objects [typically shells] or our drawings from a few weeks before, create a wire sculpture.

thumb_IMG_6767_1024

I followed the first idea but with some changes and then went for simple

thumb_IMG_6777_1024

I then did a quick shell but soon moved on

thumb_IMG_6770_1024

I liked the simplicity of line and the milliner’s wire with its tread wrapping means that the surface is dull so I went ‘off piste’ for other forms ….

thumb_IMG_6773_1024 thumb_IMG_6776_1024thumb_IMG_6778_1024thumb_IMG_6782_1024

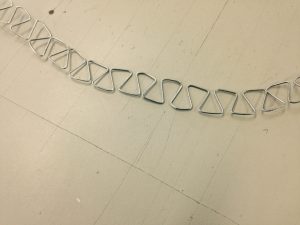
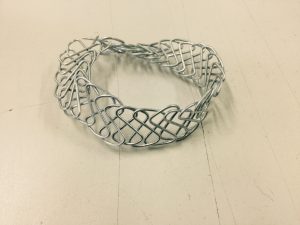
And then went for some wire bending, followed by squeezing, and twist and then a different squeeze to something that made me think it could form a piece of jewellery,

thumb_IMG_6790_1024thumb_IMG_6792_1024thumb_IMG_6793_1024thumb_IMG_6794_1024  thumb_IMG_6796_1024thumb_IMG_6797_1024

The way the wire is folded means than increasing the twist is easy but trying to straighten it out is not possible.

Other stuff is happening and will arrive on this site when finished.