Back in November 2018, I was asked by Dave Taylor, the deputy Mayor of the City of York, if I might be interested in designing a sculpture for Nanjing – something that would mark the twinning of the cities. I was delighted to be asked and gave him my first thoughts.
All was quiet until mid-April when I was told the project was on and would I like to go to Nanjing [expenses paid] in late May? I’d get to see the site for the sculpture and pitch my idea! Jill could come too if she paid her airfare. Of course, I needed to move from a few words to a model that expressed my thoughts, as well as get visas and decide if we could visit other parts of China [more on that in another post].
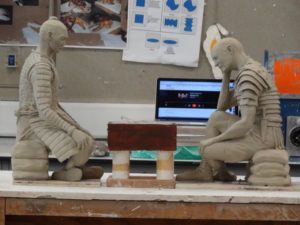
We returned from holiday near Chester and these armatures
became two figures in a few days.
I based the Chinese armour on the Terracotta Warriors [who were far too early for the Ming Dynasty – the time Nanjing – [Southern Capital] was founded by the first Ming emperor]. I was thinking that it might make the sculpture attractive if the laps of the figures were suitable for children to sit for photos, and the chessboard could be set up with an interesting match to consider.
These models were used to illustrate my initial proposal, which I also got to present at a meeting in Nanjing.
We arrived in Nanjing and found that there were sculptors from Belarus, Cambodia, Germany [two, one from old east and one from west], Hungary, Iran, Jordan, Russia, Vietnam, Zambia, and Zanzibar. We were taken to the park and given a tour with indications of where the Park’s designers’ thought sculptures could be placed. We were also shown places in Nanjing that they thought we should know about.
Here’s the site I chose – the lady with the hat [Monica, our Chinese contact] is standing at the point and I’m sitting there with “Mr Jordan”.
The site is slightly sloping down to the lake and I thought that two large chessboards could be set into the ground [one international and the other a Chinese Xiangqi chessboard] and the chess pieces could be based on landmarks in York and landmarks in Nanjing. Moreover, it could do with some seating and trees for shade.
By the time we arrived home, I realised that the figures needed to be sitting on something, and the Chinese soldier’s armour should be that of the early Ming Dynasty.
I made the armatures on the 5th of June and started modelling. I also contacted the Royal Armouries in Leeds and with the help of Dr Natasha Bennett [curator of orieintal collections] and the library staff, settled on a representation of early Ming Dynasty armour based on illustrations from the period.
And then Ed Poxon, my tutor, mentor, & friend died suddenly on the 22nd – we had been discussing the day before how to plan to make suitable moulds. Keeping Ed’s “Let’s do it!” attitude in mind I tried to carry on – modelling was within my remit but how would I manage the mould making?
By the 26th June the models were substantially complete.


Mould Making
Decided to go for re-usable Vinamold in a plaster casing. One needs to sort out the dividing line for front and back, get the model horizontal and level, clingfilm model ,and apply a clay blanket [dark clay] and make boundary wall [light clay] to stop plaster running away, and pour plaster case. The clay cones are to help air leave the plaster case when Vinamold is poured and then they fill with Vinamold. Once solid, the cones to help locate the Vinamold in the plaster case.
The plaster case comes away with the clay blanket to reveal the model. Tidy up the join along the dividing line between the front and back parts and add a clay boundary between arms and torso. Remove clay from the plaster case, refit over the figure and pour hot Vinamold.
Process is less involved for the other side as all the join lines have been addressed when making the front of the mould. the straws let air out of the mould but block off with Vinamold – the red stuff.
Then you take it apart to get the figure out – this needed cutting of the Vinamold around the legs [and this area would need holding in place later with needles]. A test pour of plaster to get an idea of how the mould should be handled – and also gain an idea of volume needed for a good cast.
Repeat the process for the Roman [apart from the plaster check].
Casting
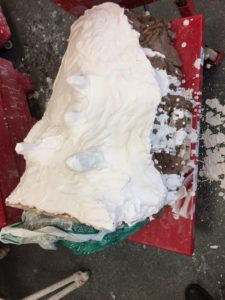
The models were cast in two pourings of polyurethane resin, which goes off in about two and a half minutes from contact of the two-part mix. The inside of the resin shell was filled with polyurethane foam to give the model more rigidity. Thankfully, both the Chinese and Roman soldiers came out without major flaws. As you can see both had quite a bit of flashing – extra bits of plastic along the join line of the mould where the pressure keeping the mould parts together wasn’t strong enough to keep the runny resin out.
Finishing off
Once the flashing had been removed and a little epoxy resin used to re-build a damaged ear and a couple of bubble holes they were ready for painting. I used a grey car paint primer followed by Ford’s bronze paint from Halfords, plus a little bronze powder dusted here and there. And here they are. They were dispatched on the same day as last photographs below.
I have had confirmation that they arrived safely and [this week] passed the first assessment phase.


