Monthly Archives: March 2016

Concrete advances…

You will recall, if you have been following this blog, that I cast in concrete a hexagonal cylinder of the void space around small balls in hexagonal close pack [well as close to that idea as I  could manage 1st time round].  I said that I’d leave getting rid of the material of the balls until after we had had a half term break.  Well, not so, I pursued the piece to completion today.  First, I drilled through so that all the balls had their internal spaces connected with the outside World – I didn’t want any of them exploding.

IMG_5800 IMG_5801


Why is it laying on the ground?  Well, that’s because it was waiting for the fire [thoughts at college was that it would produce too much black smoke]…..

IMG_5802 IMG_5803


….. and then it was on the fire [and not much smoke to speak of either].

IMG_5806

IMG_5805


IMG_5808

IMG_5807


Plenty of burning BUT not every bit of plastic went.  I was concerned that if I left the concrete in/on the fire for too long it would degrade so much that I would only have a crumbly ash at the end.

Here is the finished result; these static pictures show the void in concrete, coloured by the smoke, the plastic oozing over the concrete as it melted [but before it burnt], giving the white streaks, and  some charring.

DSC07646 DSC07647DSC07648 DSC07643 DSC07644DSC07645


DSC07651 DSC07652


The video shows how all the spaces are interlinked and we can see straight through.

Thank you for looking.  Vincent


Diversions

Someone said to me shortly after I started on the course that I should do stuff other than the projects or I might lose my sanity.  So, here are two extra-curricula pieces.

Jill has just completed a lovely embroidery on velvet and, like other pieces, it seemed worthy of a frame designed for it.  I thought that a shallow D section would be best and relied on a piece of handrail, which the sawmill at Howarth timbers, kindly ripped – as you can see.

IMG_5723

IMG_5724


Then, with the help of a friend and a table saw, we ripped two grooves up the back of the length: One as the stop for the rebate to take the embroidery and the other to make it easier to take out the wood later – as you will see.  I couldn’t take the wood away until the mitre corners had been cut otherwise the timber would have tipped during cutting and thereby screw up the alignment of the mitre joints.

Now you can see the embroidery and working out how and where to do the cut for the bit that sticks out.

IMG_5765IMG_5766


Here, I must pay tribute to Chris & Carrie who produce wonderful woodcarving videos at  their woodcarving workshops website.  My carving and camera are far behind theirs but here’s a clip of making the rebate – sorry my head gets in the way but I Had to see what I was doing [Carrie & Chris should be watched to see how such things should really be done].

Then it was a case of priming, filling, painting ….

IMG_5781 IMG_5780


… and there is the frame complete.

IMG_5784

The other small project is a stamp of JS in a piece of end grain holly [dense and fine grained and from the garden].  Start point was to get the end grain smooth, apply the design, and then get cutting!

IMG_5797

IMG_5798


Jill’s happy with it but I think the top bar is a bit a narrow.

IMG_5799IMG_5818

A final trophy

In trophy VIII I showed you how I’d been casting in plaster the voids between stacked golf balls.  Well, end result is this.

IMG_5814 IMG_5815


I initially decided to fix nails into the plaster and then embed them into the piece of oak but when I stood the plaster with nails on the wood it looked good to me, almost floating so I adjusted my thinking [and made holes just deep enough to superglue the nails].

IMG_5816

There’s some other stuff building up so I’ll get on and do some more blog posts for them…. Vincent

Notes from the wheel & glaze room

Here is the outcome of some more throwing and glazing.  First up are three pieces from the pugged clay that gets recycled at college with the same overall glaze but a second glaze applied in different ways.  The wide mouthed vase was dipped in one glaze and then I tried to dip the widest portion in.  I think that it looked better before firing – in matt pink and orangey brown as in the right hand picture.

DSC07597IMG_5679

The more slender vase was likewise dipped in the first glaze but then I trailed fingers wet with the second glaze over the first; there a few drips which ran in different directions.  In comparing the left and right images you can see how firing changes colours and sharpness of edge and the  one orangey brown pre-firing comes out with some very dark browns, which have “sunk” towards the base of the vase while the glaze was molten.

DSC07602IMG_5673

Final pugged clay is a flatfish bowl with the second glaze dripped on top and spread around the rim.  Perhaps it is easier with this piece to see how much the second firing affects the pattern edge and consistency of colour.

DSC07603IMG_5681

With all of the above pieces, I think the overall glaze helped the second glaze to run and spread out.

The other three pieces are in a St Thomas’ clay, which has less iron in it so offers less brown to the glazes.  The overall glaze was supposed to be a dolomite matt opaque glaze but I don’t think much of the opaque elements are present – I did give it a very good stir!  Also, there was a slight rush on to complete the glazing ready for the firing and I didn’t take shots of the pieces below before they were fired – sorry I shall try to do so from now on.

DSC07604

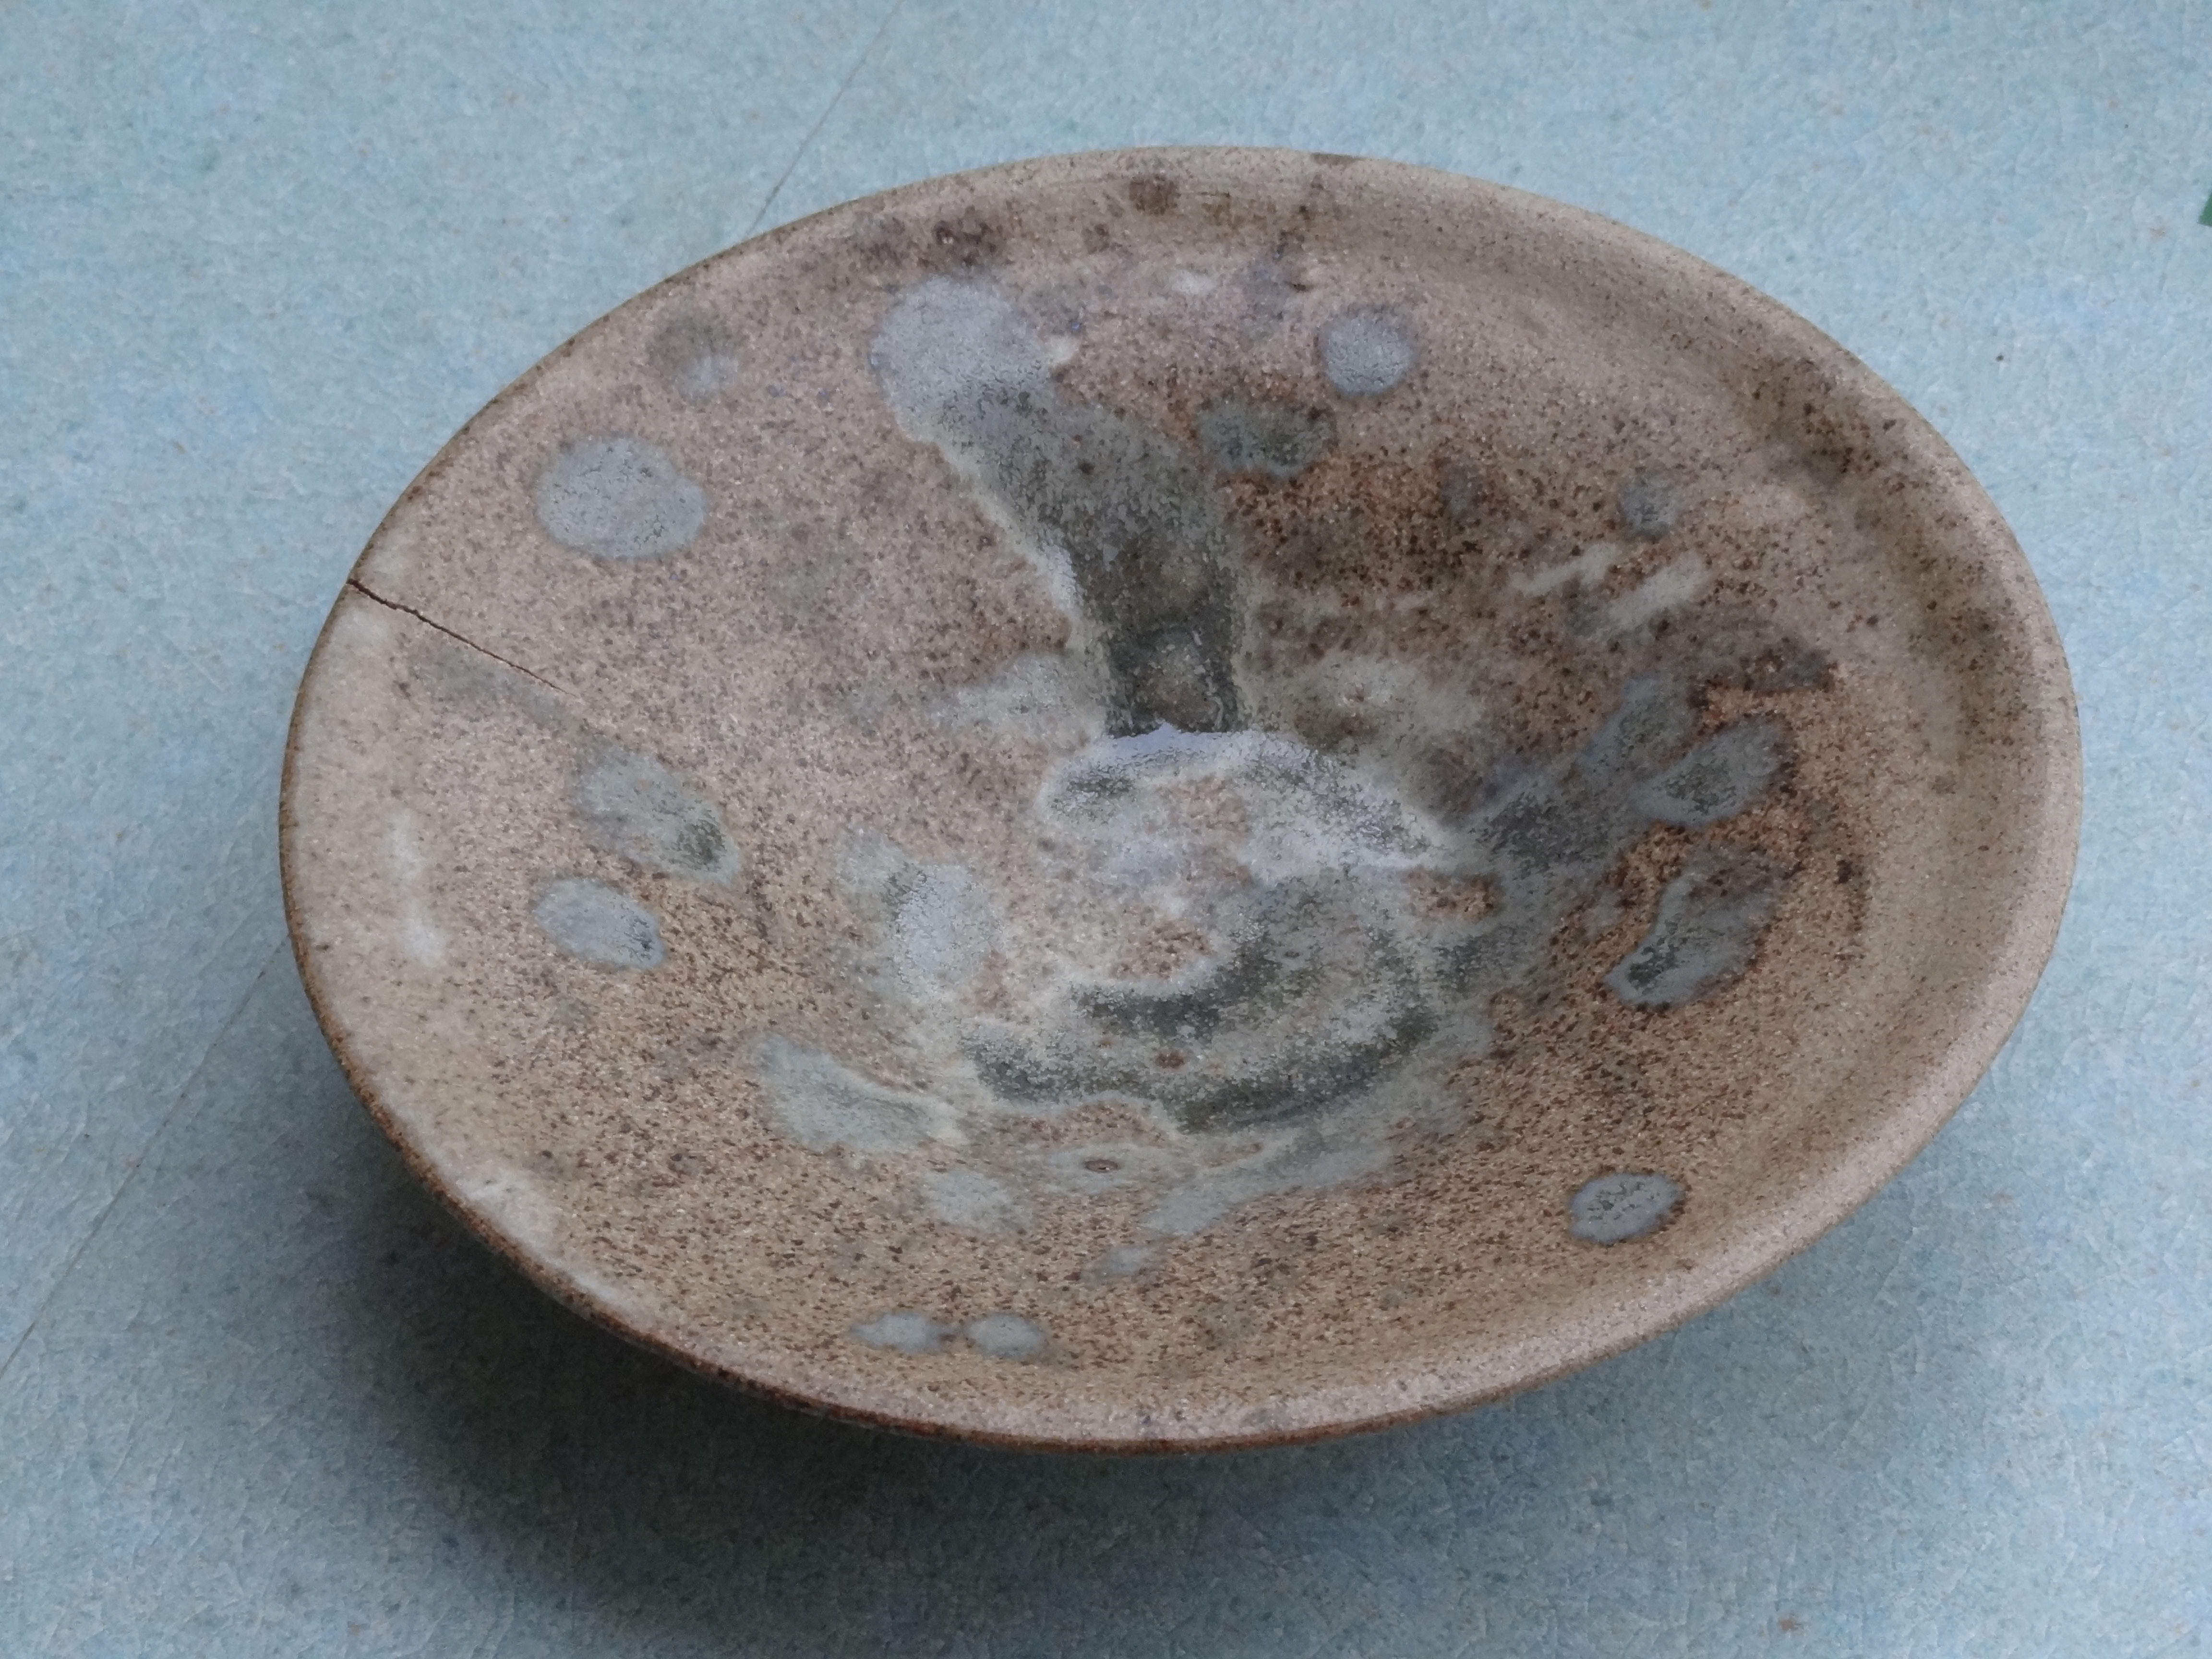
This is another shallow bowl and I dripped the second glaze on it.   Depending how thick the drips were has affected how much they have run into the bowl.  Unfortunately, there is a crack in the rim [at about 9:30]. I was  surprised that it has survived the two firings and not broken.

DSC07608 DSC07607

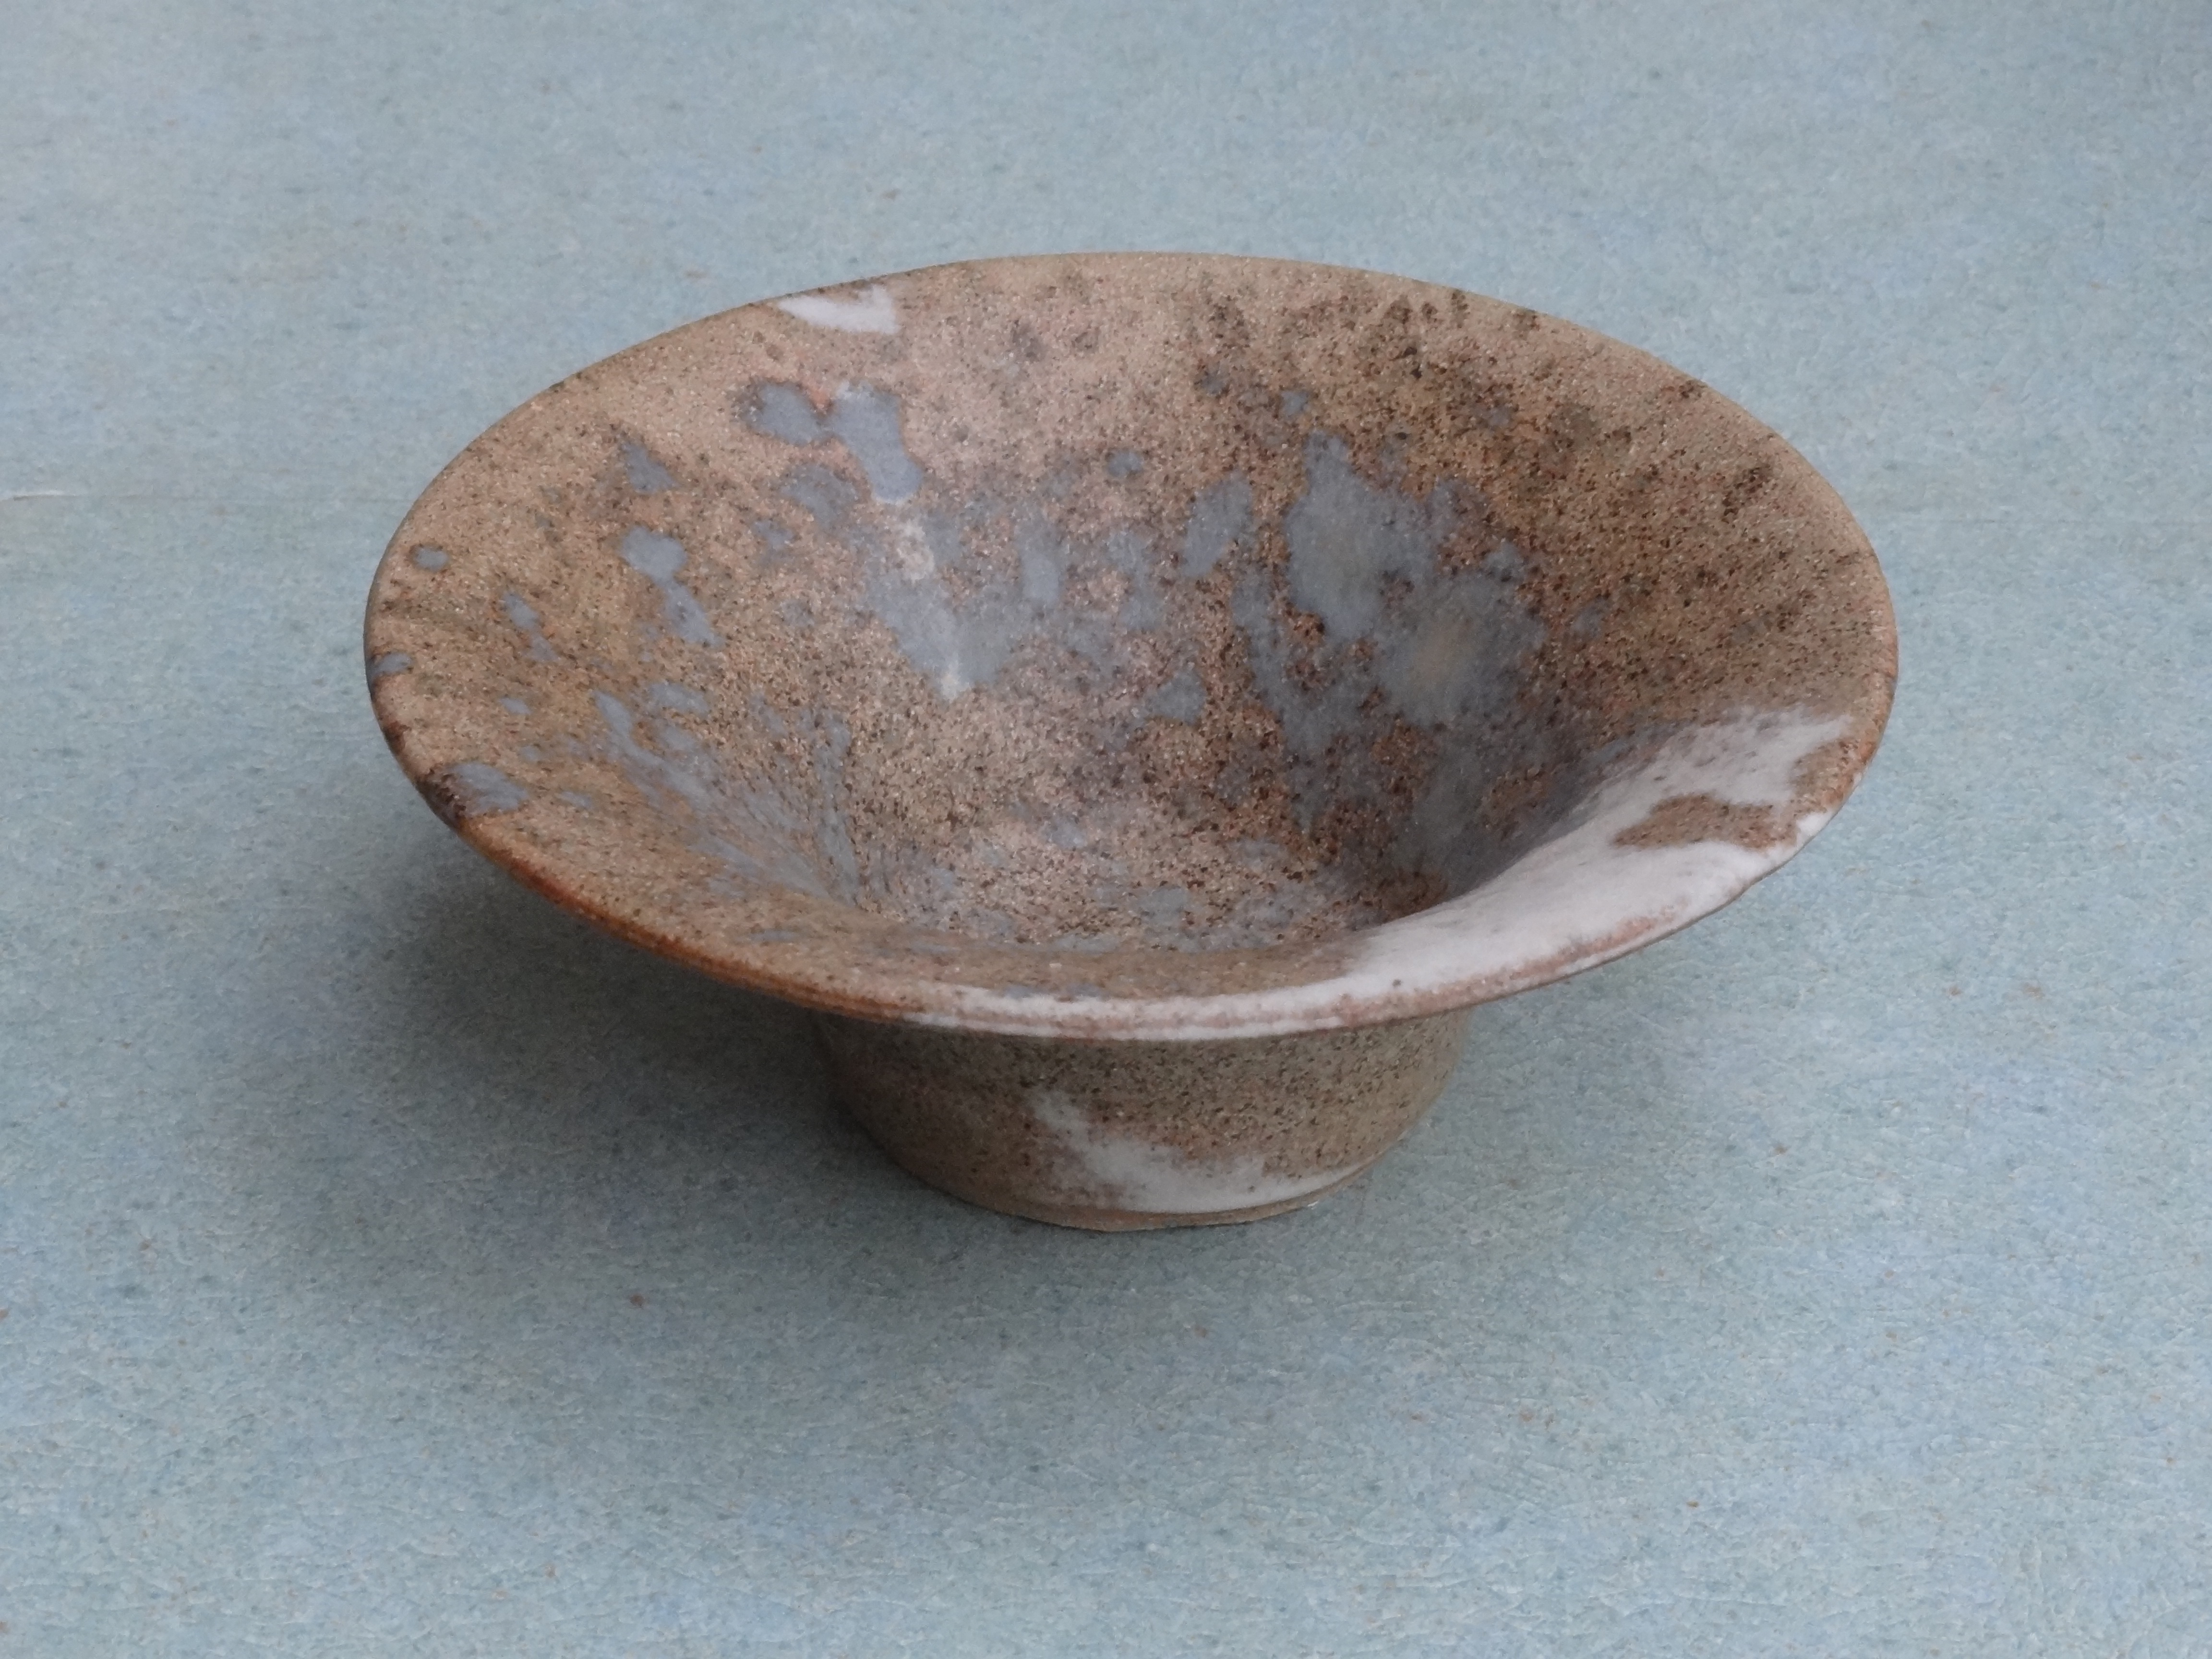
This odd shaped bowl had two different glazes poured in off my hand – scooped the runny glaze in a cupped hand, poured it in towards the base and then poured the excess out over the rim. Then did the other glaze – the white on the edge is from the overall glaze; a bit of serendipity as I think it would have looked less interesting if the white was all over.

DSC07606 DSC07605

And the final piece [which I’m pleased with both the shape and pattern] had the second glaze flicked on it while I still had traces of the pale bluish glaze on my fingers.  The white [1 to 3 o’clock is, I think, some of the dolomite white].

Haven’t been on the wheel for awhile so it’s probably time to have another go – if I can get hold of some St Thomas [or other low iron clay for throwing] before it all gets used up.

Vincent

Ping pong III …. Interval time

Good and not so good has come out of re-assembling the shuttering around the concrete and ping pong balls:  Good in that the cracks seem to be less evident and the concrete seems more solid.

IMG_5720

Good in that the the mix I used looks as if it might take a polish – given the shiny surface on the bits which filled up the cut portions of balls.

IMG_5713

Good that the hexagon shape remained regular…..

IMG_5705

But only at the bottom!  The top sheared two screws and opened up – the wonders of water and the forces of nature!

IMG_5704IMG_5706


What next?  Well, the gaps are very narrow between the balls and I fear that if I try and dig the balls out bit by bit the whole thing will all fall apart [one bit at the top has already broken off].  So the plan is to burn them out [they might melt out which would help lessen the smoke].  However, if I try that now, the water in the concrete is likely to boil and blow the whole lot up.  I shall just have to wait until it dries out more – I shall start again on this project next term!

Vincent

Ping pong 2

Well, I carefully took the shuttering off the concrete and ping pong balls to see how it looked…

IMG_5654

IMG_5659


… pretty bad. The surface hasn’t got as many bubbles in it as I had thought would be the case.  Most of the part cut balls filled, at least in part, with concrete so there was less to fill the void and take the concrete to the top of the shuttering.

IMG_5660IMG_5657


It is clear that taking the pressure off by lifting the top meant that the balls expanded and cracked the concrete into layers.  However, I’ve taken the view that it can’t get much worse if I clamp everything up again while the concrete still seems soft. Maybe, just maybe, the cracks will heal over and the structure stand the forces generated when the shuttering comes off – probably that will happen in a week or so [I’ll ask Ed for guidance].

IMG_5665 IMG_5664

Time to something in no way related to the Trophy project.  Vincent

Trophies X… Ping pong…

Back in Trophies VIII I mentioned that I had ordered 150 ping pong balls to cast in concrete.  Well, they arrived and they would never have been any good for ping pong – wrong plastic and internally lumpy so they have little bounce and that bounce is highly unpredictable!  So, some have been used.

I made a hexagonal column out of some “waste” ply and Phil in the joinery department kindly put a 60 degree chamfer on one long edge of each piece.   Top and bottom drilled out for fixing and pouring.

IMG_5632

Balls stuck together with superglue and 1/2s and 1/3s made to fill out the form.

IMG_5607IMG_5630


IMG_5610

IMG_5633


So it all started coming together yesterday but I had only made a rough estimate of how tall the hexagon would be; I hadn’t stuck enough balls together.  “Never mind”, I thought squeeze some on top….

IMG_5634

… and screw the lid down – a bit of compression should help with the enlarging the “kiss” points between the balls.  And then I did my calculations about how much concrete to make – work out the full volume and the void volume for the concrete is a percentage of that – simple BUT I did not allow for 1] the fine concrete powder fitting into the gaps between the sand grains and 2] that the part balls might fill with concrete.  Consequently, I was short of the lid by about 1/2 a ball’s depth!  Lots of banging of the form to get rid of air bubbles and get the concrete to flow between the balls.

This morning, when I opened the top, it was clear that a lot more time was going to be needed before I could take off all the shuttering and work on the concrete as it was sticky like barely cooked cake mix.

IMG_5642 IMG_5643


You can see where I’ve removed three balls that the kiss points are relatively large and that should help when I try to remove the ping pong balls.  There is a further downside to how I have managed the pour and that is by releasing the pressure of the lid today, the balls can start to expand putting the concrete under tension, which it will not like and so it may all pull apart before it has set – we’ll know how well it’s gone before Easter.

What next??  Cheers, Vincent